
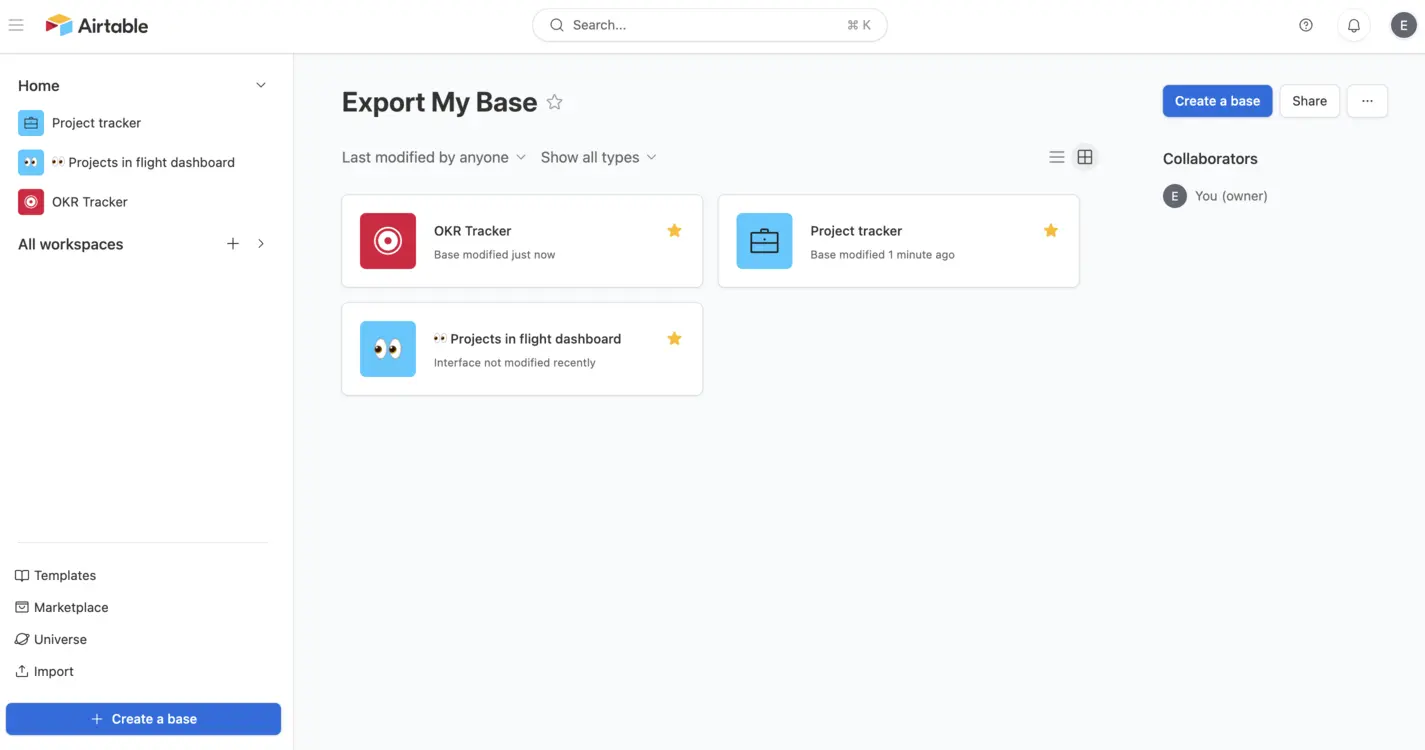
Airtable Data Management
A Step-by-Step Guide to Exporting Your Airtable Data
In the digital age, data is the backbone of any organization. Whether you use your business data for analysis, reporting, or backup, the ability to safeguard and export your data is an important requirement for any critical business tools.
Airtable, known for its flexibility and user-friendly interface, offers a straightforward process to export data. This guide will provide you with a step-by-step approach to exporting your Airtable data, ensuring you always have a copy of your data wherever you need it to go.
Sections
- Understanding your data export options
- Export individual tables manually (using Airtable app)
- Export all tables in a base at once (using Export My Base)
- Export Airtable data (using paid tools)
Understanding your data export options
Before diving into the step-by-step export process, it's helpful to know that you have a few different options to export your Airtable data. You can choose to manually export single tables using the native capabilities of the Airtable tool or use third-party tools to export an entire base at once.
Because every organization's data needs and workflows are different, this article will give an overview of the options so that you can choose the best approach for your organization.
Export individual tables manually (using the Airtable app)
Airtable provides a simple way to export your data as a CSV file directly within the app. This is great for situations where your organization uses a single table or a small number of tables, although it can become time consuming to manually export each table in a more complex implementation.
Here are the steps to manually export an Airtable table to a CSV file that you can download.
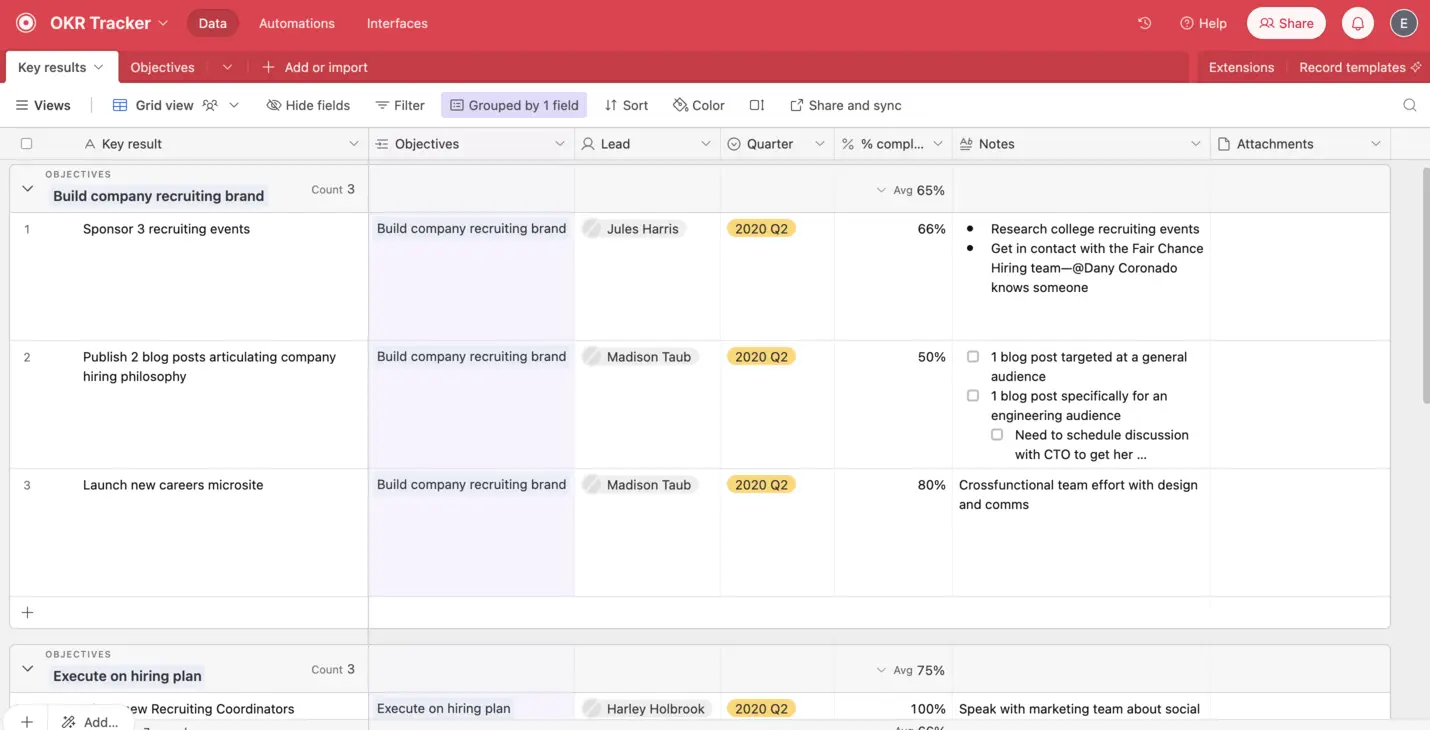
Step 1: Select your table
Open your Airtable base and navigate to the table you want to export.
Step 2: Configure your view
Airtable exports the data as it appears in your current view. Make sure to adjust filters, sort orders, and fields to display the information you need.
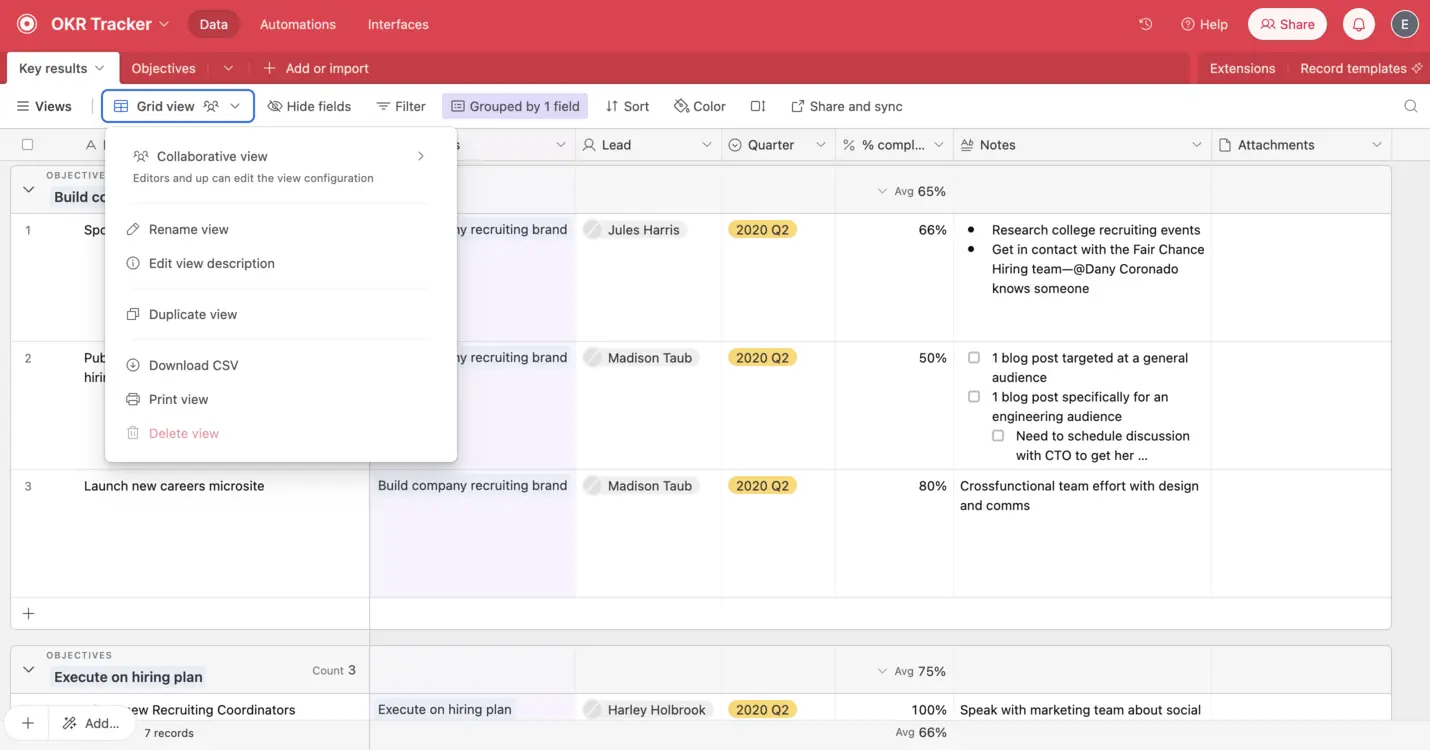
Step 3: Export to a CSV file
Find the views menu in your table. From the dropdown, select “Download CSV". Your data export will begin and, when ready, be downloaded to your computer in CSV file format.
Step 4: Name your backup file
Name your backup file with a consistent naming convention that includes the backup date and the name of the table for easy retrieval at a later date.
Step 5: Repeat for additional tables
If you have more tables to export, repeat the above steps for each one.
Export all tables in a base at once (using Export My Base)
If you have many tables to download, using Export My Base is a much simpler option to download all tables in a base at the same time.
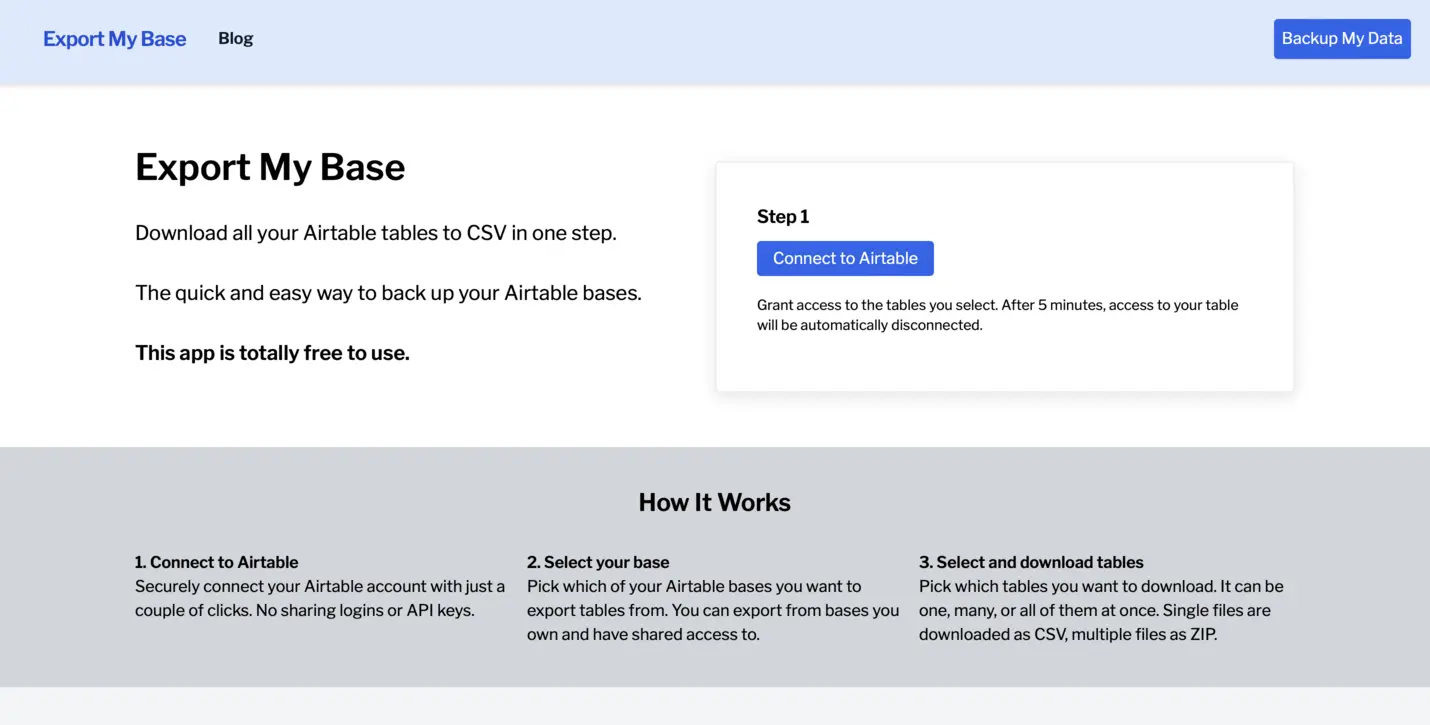
Step 1: Navigate to the Export My Base home page
Export My Base provides a free tool tool that allows you to download all tables within a base at a single time. You can also connect to multiple bases, enabling a consistent and efficient way to export all of the data in a complex Airtable base.
Step 2: Connect to Airtable
Click the "Connect to Airtable" button to begin connecting your Airtable account. Export My Base will only connect to the base(s) for which you grant permissions in the following steps.
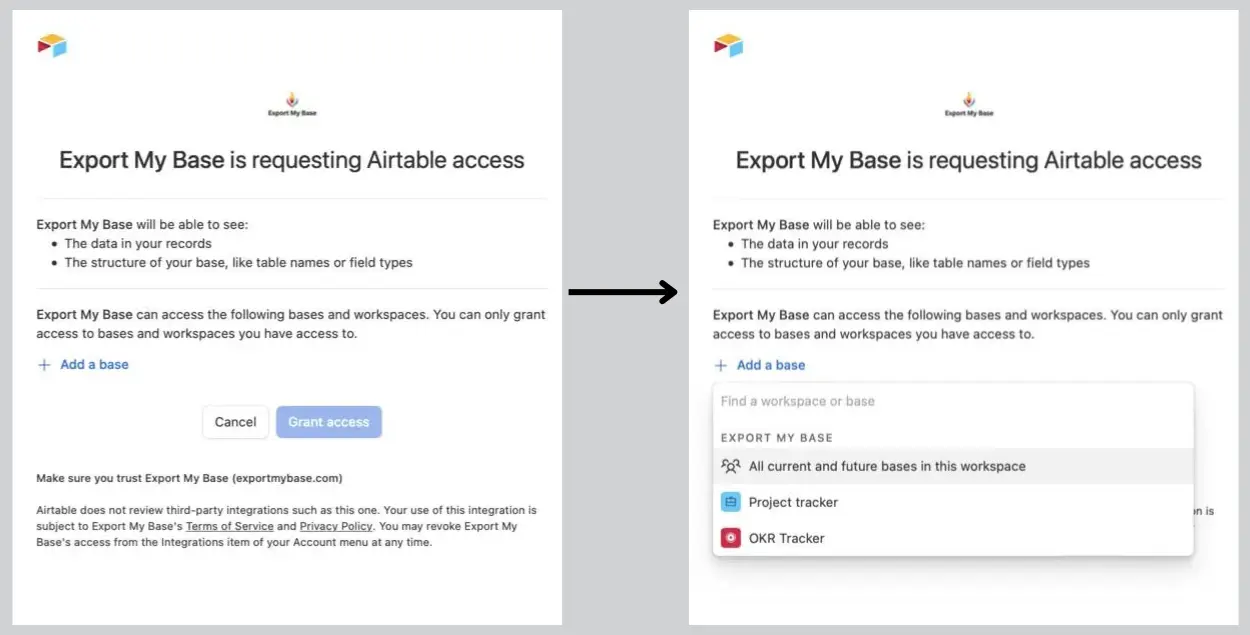
Step 3: Select all base(s) from which you would like to export data and grant access
After reading the disclosures about how Export My Base accesses your Airtable data, click "Add a base" to grant read-only access to one or more of your bases via Airtable's API connection.
With Export My Base, you can grant access to specific bases within your workspace or you can easily grant acccess to all bases within the workspace.
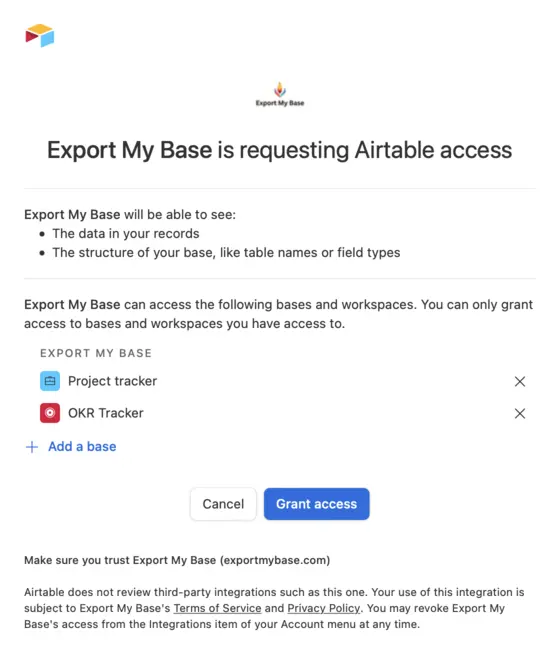
Step 4: Grant access to your Airtable base(s)
After you've selected your base(s), click "Grant Access" to allow Export My Base access to backup your data.
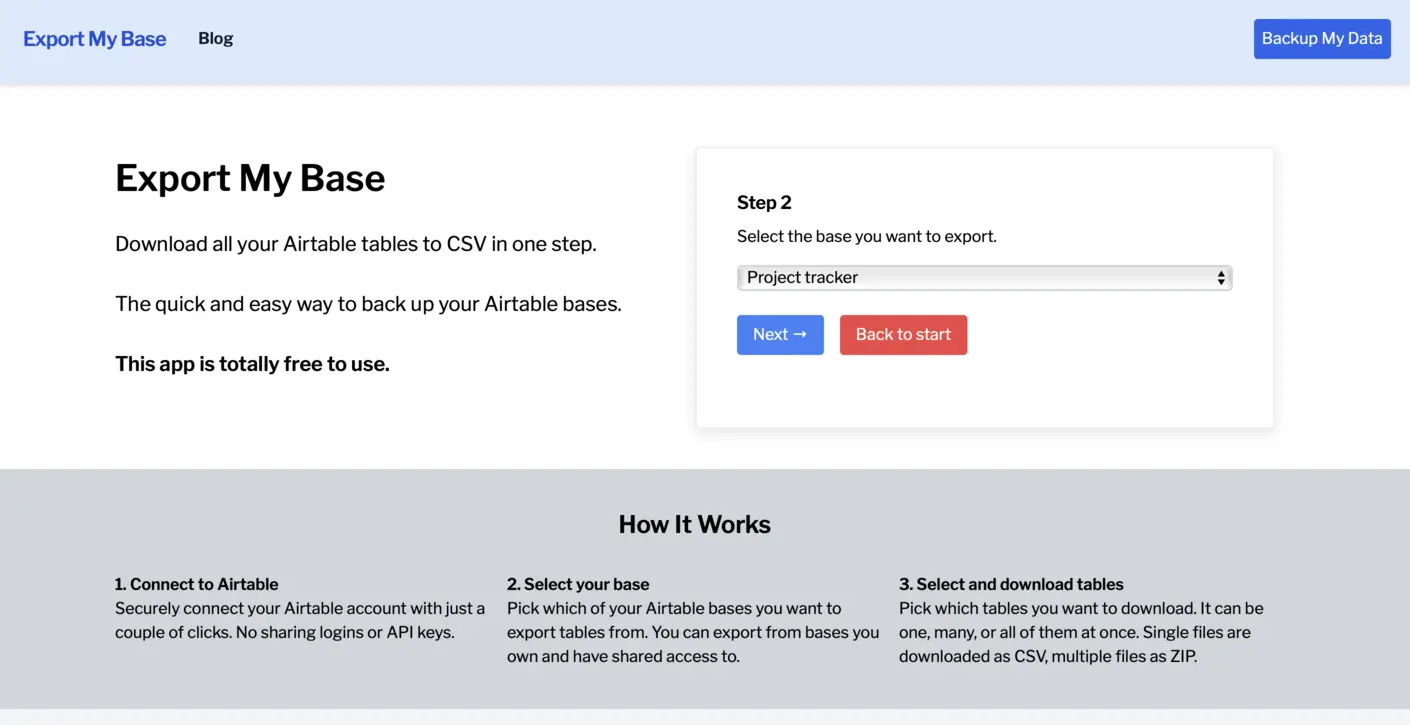
Step 5: Select the base you would like to export
Select your base and click "Next".
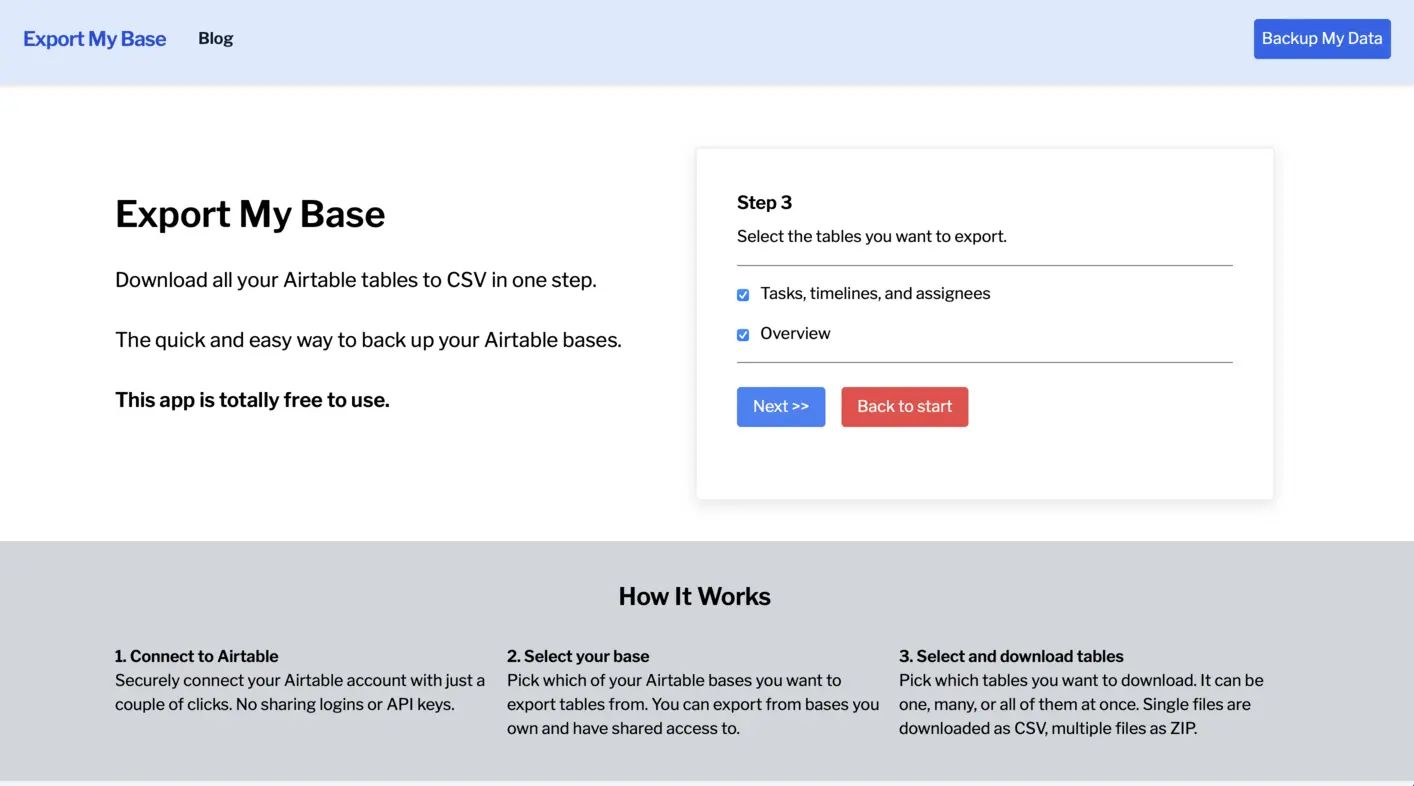
Step 6: Select the table(s) you would like to export
Select as many tables as you would like. If you select more than one table, Export My Base creates a convenient ZIP file that contains all of your CSV backup files. When you're ready to download, click "Next".
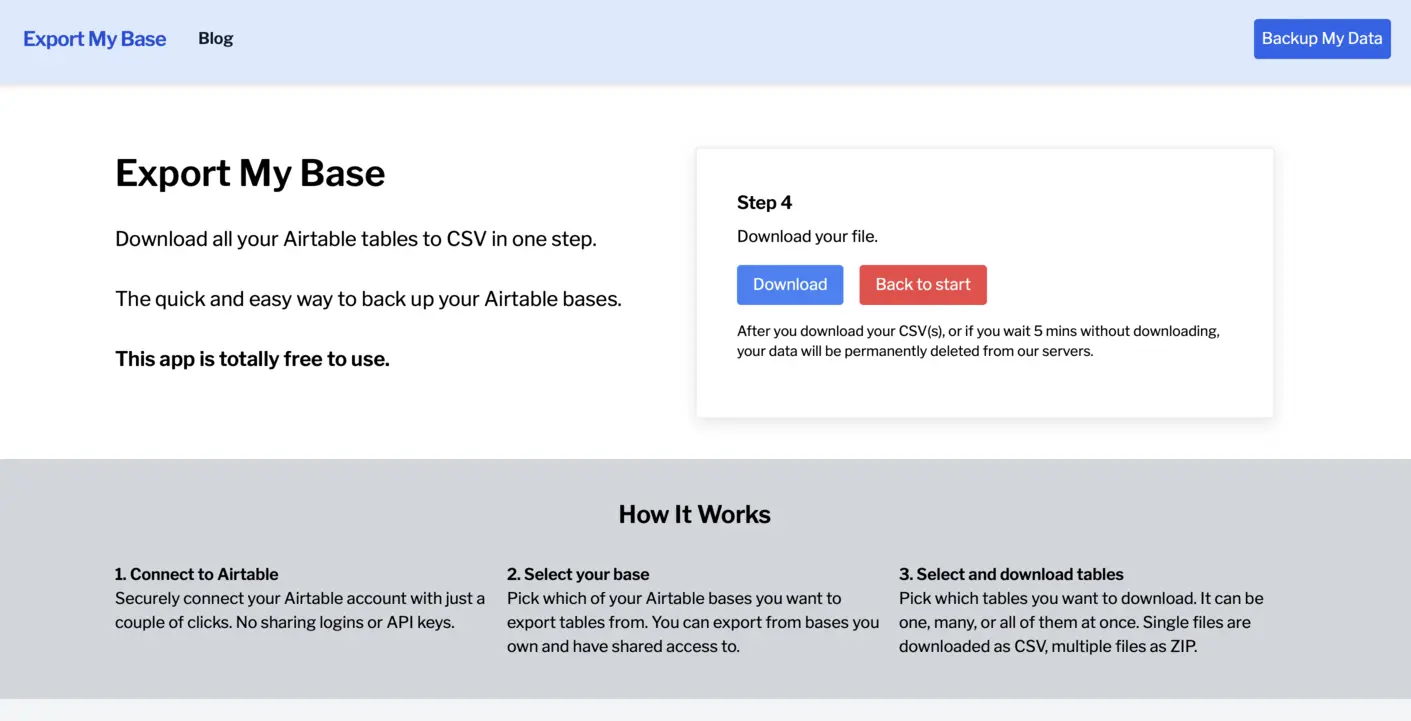
Step 7: Download your CSV or ZIP file
Export My Base will compile the information within the selected table(s) and prepare a file for you.
When you are ready to save a copy, click the "Download" button. Each CSV or ZIP file will be downloaded to your local drive, labeled consistently every time. After your file has been downloaded, it will be automatically deleted from the Export My Base servers.
Step 8: Repeat for additional bases
You can repeat this process for each base that you granted Export My Base access to export. After you've backed up all of your bases, you'll have a full archive of your critical business data.
Export Airtable data (using paid tools)
There are many paid data tools that offer the ability to move data between systems and handle automatic actions, with varying degrees of complexity. Examples include generalized automation tools like Zapier or Make, specialized data backup tools like On2Air, and enterprise data backup tools that may be used by IT teams in a rigorous compliance and governance process.
Regardless of the method you choose, you have many options to export your organization's data from Airtable. A good practice is to establish a regular backup cadence, either daily, weekly, monthly, or annually. You may choose a cadence depending on the importance of the data to your organization and the controls you have in place, but every organization should have a data backup and recovery plan.